Most printer manufacturers elect to install the Polar Cloud Protocol Software directly onto their machines. This makes it easy for you to get it connected and printing as you pull it out of the box - no Raspberry Pi’s, no power supplies, no ethernet - no hassle.
Adding your printer to the Polar Cloud is easy. Doing so brings your 3D printing into the 21st century with a camera stream you can access from your pocket, text message updates from your printer, a rich print history, and more! Start, stop, or pause a print from anywhere.
If you’re unsure whether or not your printer works on the platform, start by searching for it in our Compatibility List. The printers that work natively are listed beneath the search, find yours there for tailored setup instructions based on your Make/Model.
Adding / Connecting Your Printer
Sign in at Polar3D.com and find your Username and PIN (see below)
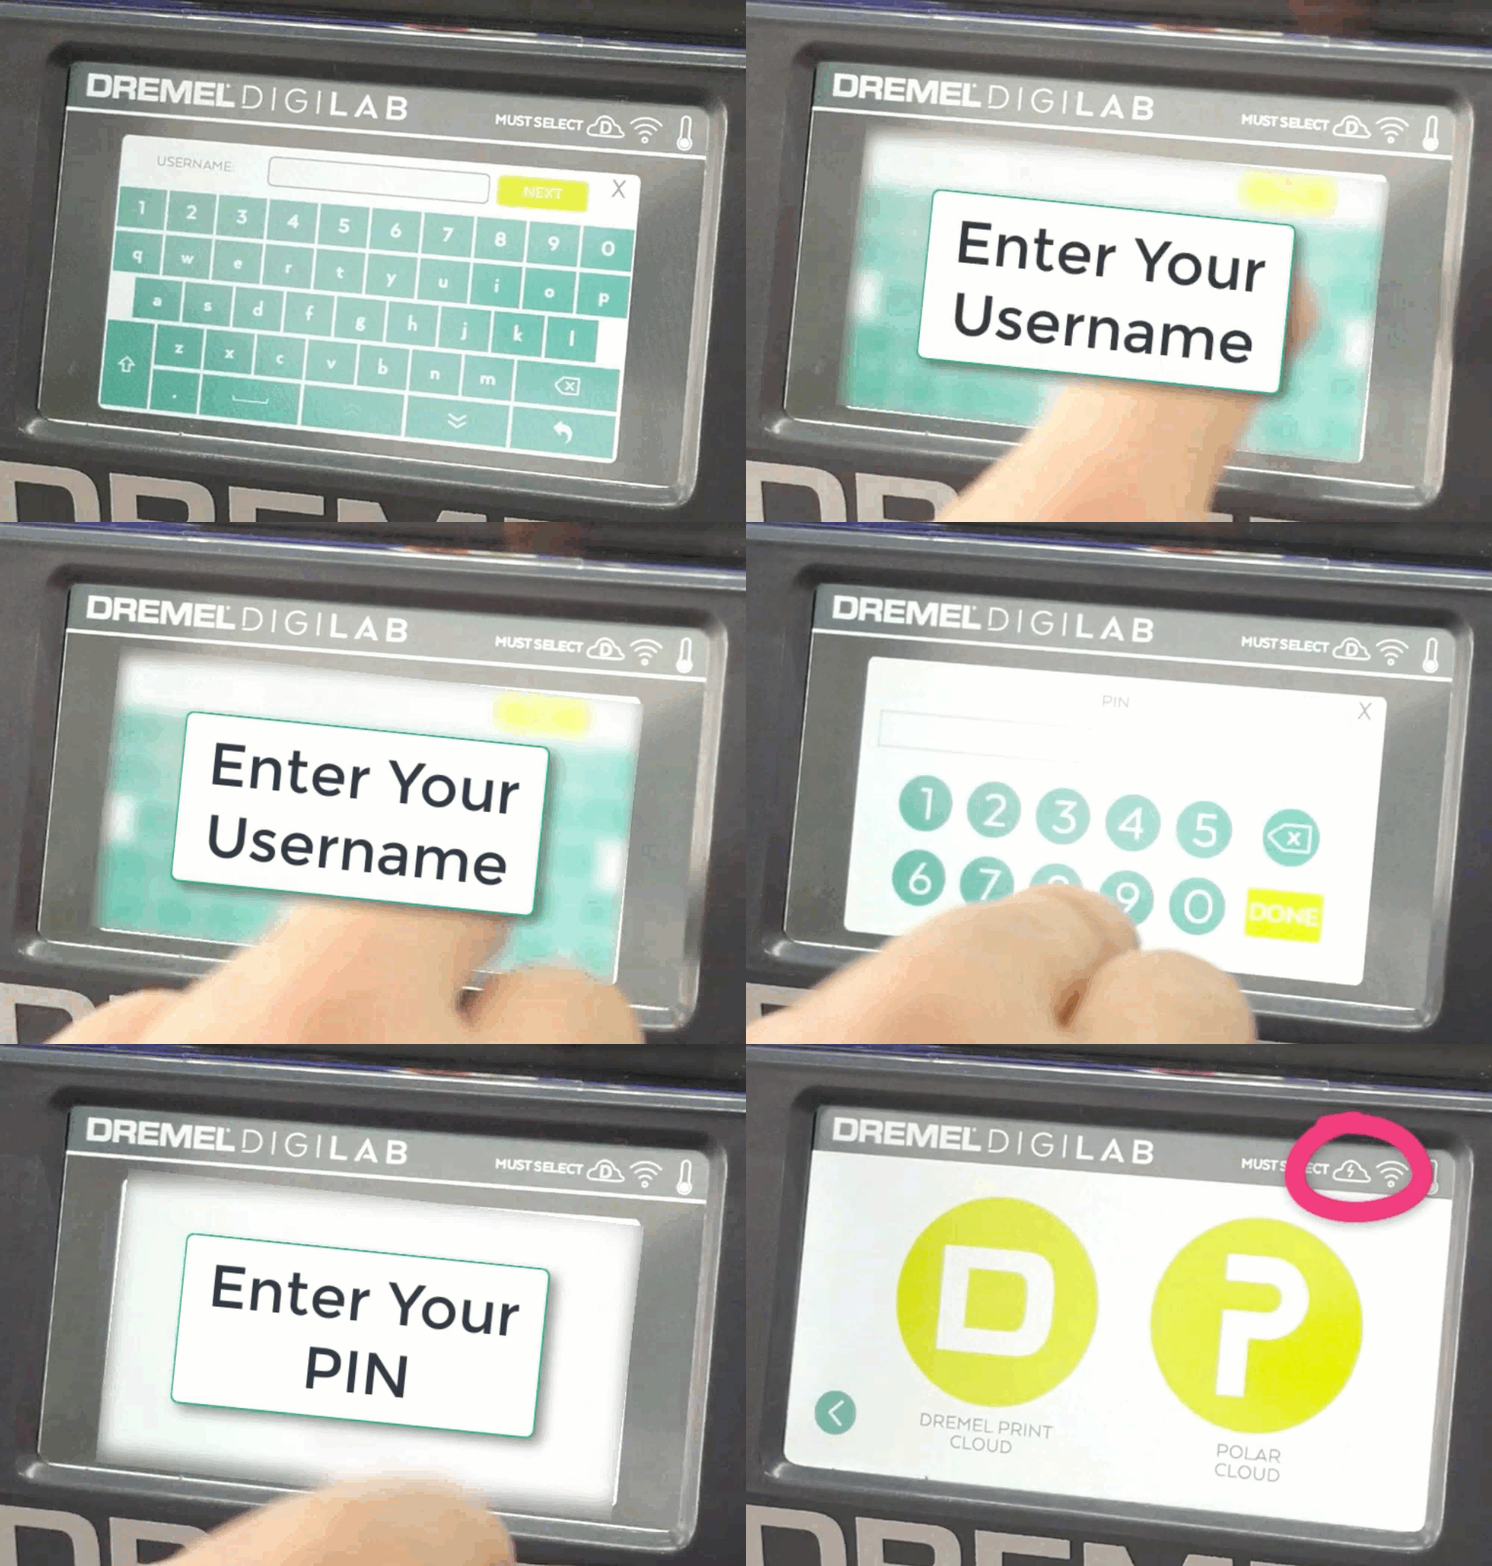
Enter the Username and PIN into your 3D Printer
Enjoy using your printer on the cloud!
Finding your Username / Account / Email
These terms are all talking about the same thing. If your printer asks you for your Username, just know this is the Email Address that you use to log into the Polar Cloud.
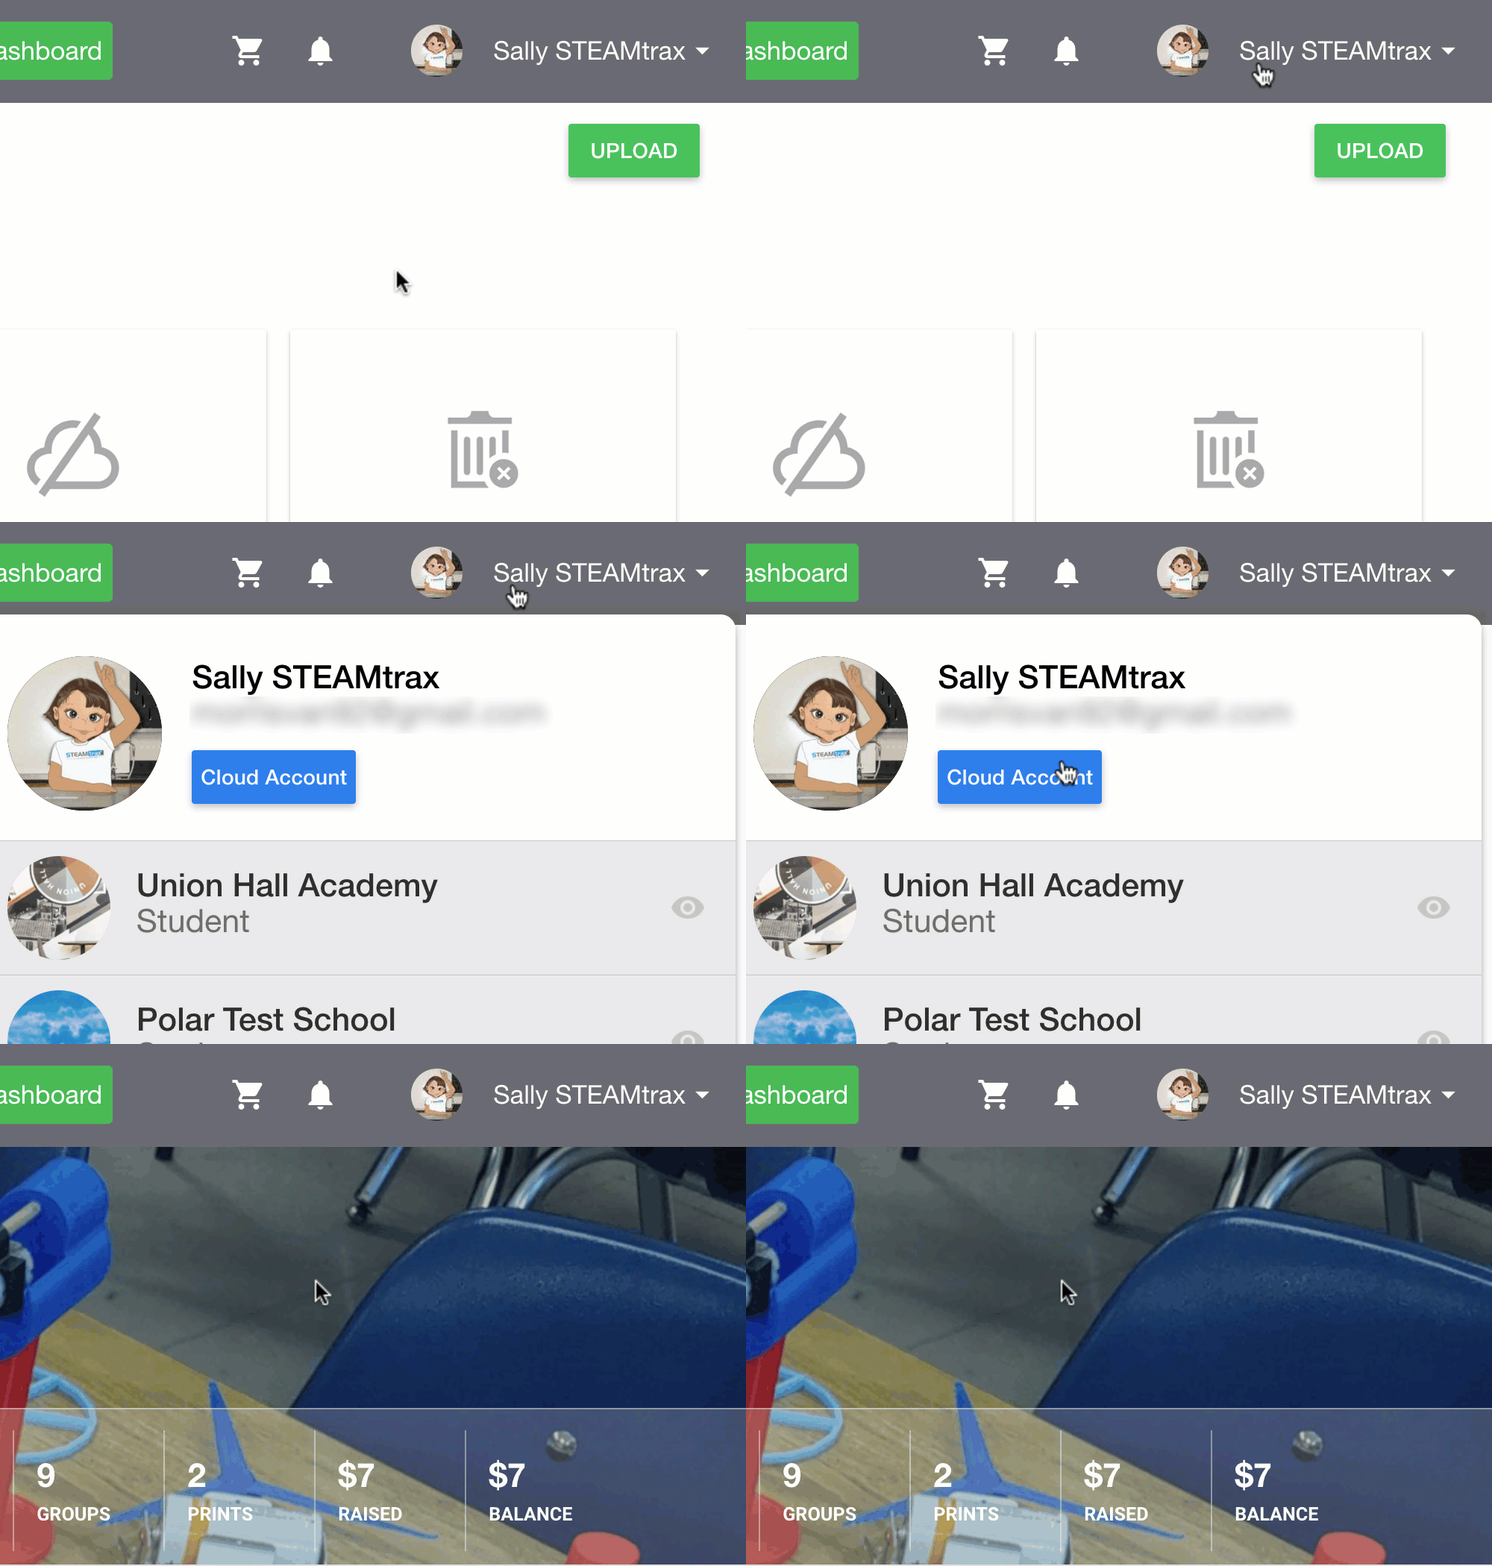
If you’re unsure what email you used when you signed up, you can check by clicking on your name in the topbar, then clicking the “Cloud Account” button. Scroll down and look for “Email / Username”.
Finding your PIN Code
Scroll down on your account page and find the PIN Code. This is a 4 digit code automatically generated when you created your account.
📝 If your PIN is only 3 digits, it will not work! Fix it by adding another digit and saving the changes.
Entering them both Into Your Printer
The steps may vary slightly depending on which printer you’re using, but you’ll want to navigate to the area of your printer (usually under Settings or Network) and find the “Polar Cloud” connection settings.
When you’re done, watch for a change in your printer’s top menubar, usually a cloud icon will be displayed! If you don’t, you might get an error, or have a network block! You can review common connection problems here.
Using Your Printer!
Save and exit the Polar Cloud plugin after you’ve entered your info. You should see the printer show up on your home page at Polar3D.com, and in your “Printers” dashboard under Make > Printers. Learn more from the articles below and happy cloud printing!


